We can't find the internet
Attempting to reconnect
The Basics
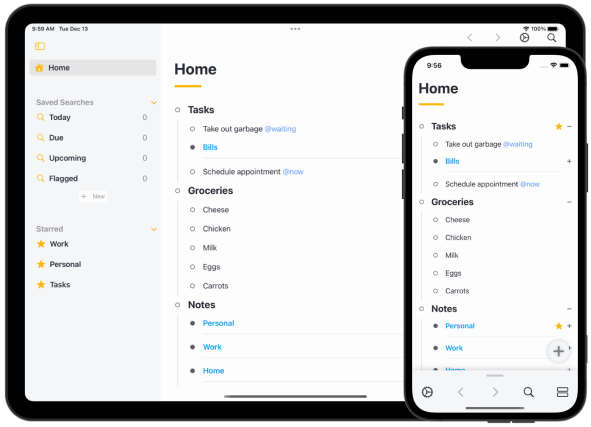
Airlist is an outlining tool that is simple at its core yet advanced where you need it.
Your Airlist outline consists of nested bulleted lists of items. Each nested list can be infinitely deep easily helping you keep track of everything from your grocery list to your most advanced projects.
Editing
-
Complete:
-
While editing, press
CMD+enterkey. - In Command Center, press Complete
- On Mac, right click on an item and select Complete or in the menu bar select Complete
-
While editing, press
-
Editing: Click on any item to begin editing.
-
Creating new items:
-
While editing, press the
enterkey. -
Or click the
+button in the bottom right corner -
Or drag the
+button
-
While editing, press the
-
Indenting:
-
While editing, press the
tabkey - Or on iPhone, while editing, press the indent button above the keyboard
-
While editing, press the
-
Reverse indent:
-
While editing, press
shift+tabkeys - Or on iPhone, while editing, press the reverse indent button above the keyboard
-
While editing, press
-
Adding tags: While editing type
#to begin a tag.-
You can also start a tag with
@.
-
You can also start a tag with
-
Insert Note: Add a
noteto any item by pressingshift+enter.-
Or on iPhone, press the
notebutton above the keyboard
-
Or on iPhone, press the
-
Multi-Edit: Hold
CMDand click on items to highlight. Then usingCommand CenterorKeyboard Shortcutsyou can edit several items at once.
Navigating in Airlist
-
Opening Command Center:
- On iPhone swipe an item from left to right
-
On Mac, hit
CMD+K
-
Zoom: Click the
dotTo left left of each item.
- Zoom Out/Up: To zoom back out_up click the item name at the top of the screen. Hovering over the top of the screen with your mouse shows all available parents.
-
Drag and Drop: Drag the
dotnext to each item to enter drag/drop mode. As your drag the yellow indicator will show you where the drop will occur.
-
Expand/Collapse: To expand or collapse a list, click the
+or-button to the left of the item. The button will not appear if there are nochildren.
-
Command Center: Quickly access all available actions by pressing
CMD+K. Actions available when an item is selected- Complete
- Delete
- Indent
- Reverse Indent
- Star
- Move to…
- Set Start Date
- Set Due Date
- Format Project
- Format Header
- Sequential
- Add New Above
- Add New Below
- Add Child
- Duplicate
- Search
- Quick Add
- Select
- Go Home
- Show Settings
- Show/Hide Complete
Keyboard Shortcuts
-
Tab: Indent -
Shift+Tab: Reverse indent -
Enter: Create new Item -
CMD+Shift+N: Open Quick Add -
CMD+Enter: Complete Item -
CMD+S: Set Start Date -
CMD+D: Set Due Date -
CMD+]: Go Forward -
CMD+[: Go Back -
CMD+“Click”: Select multiple items -
ESC: Cancel search, close modals -
CMD+F: Open Search -
CMD+K: Open Command Center -
CMD+Shift+P: Format item as Project -
CMD+Shift+H: Format item as Header -
CMD+Shift+N: Quick add a new item -
CMD+Shift+R: Set item repeat -
CMD+Shift+M: Move item -
CMD+Option+R: Star item -
CMD+Shift+Delete: Delete item -
CMD+Control+H: Go Home -
CMD+P: Print -
CMD+Shift+M: Move item… -
CMD+Shift+Up Arrow: Move item up -
CMD+Shift+Down Arrow: Move item down
Setting Dates
Set a date by:
-
CMD+S: Set Start Date -
CMD+D: Set Due Date -
Using Command Center
- On iPhone swipe an item from left to right
-
On Mac, hit
CMD+K
You can also set a due time, which will add a notification.
Both Start Date and Due Date are used when creating Saved Searches.
Repeating Dates
You can also set an item to repeat upon completion:
- After Completion
- Daily
- Weekly
- Monthly
- Yearly
Saved Search
Saved Searches are a powerful way to keep organized and filter just what you want.
To create a new Saved Search, press the + on the sidebar.
Groups and Filters
Saved Searches consist of filters and groupswhere you can filter based on the below. To add a new filter, press the +filter and +group button.
You can filter based on:
- Tags
- Start Dates
- Start Time
- Due Dates
- Due Time
- Item text
- Note text
Easily group your filters to add more granularity to Saved Searches. Each group allows organizing by:
-
ALLof the following… -
ANYof the following… -
NONEof the following…
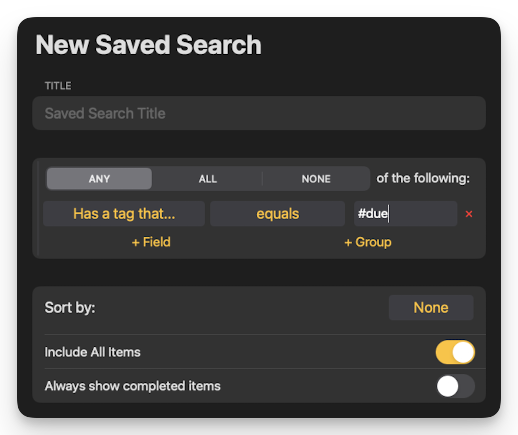
Examples
Show all items with the tag #due.
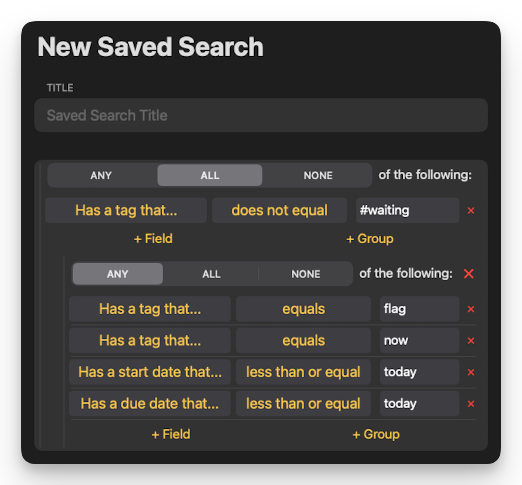
Show items with a tag of #flag OR #nowOR start/due date less than or equal to today AND not tagged #waiting.
Only Search Subset of Items
By Default, all items are searched in a Saved Search. To only search a subset of items, un-select Include All Items, then insert the item ID. The item ID can be found by right clicking or long pressing (on iPhone) the “zoom” dot.
Sort Saved Search Results
The Sort by: dropdown allows you to sort the Saved Search results by:
- Default
- Tag
- Due Date
- Start Date
- Created Date
- Updated Date
- Name
Using Tags
Tags start with a # or @.
What is Sequential?
Sequential is best suited for projects that require tasks to be completed in a specific order. You are able to list the tasks in the necessary order, and can only move on to the next task once the previous one has been completed.
Let’s say you have a project like this.
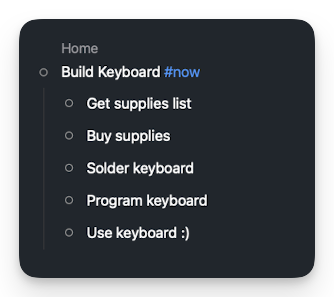
When you mark an item as “sequential” in a Saved Search, it will only show you the 1st available item to do.
Contact Us
If you have any other questions, please contact us at [email protected].
iPhone and iPad Apps

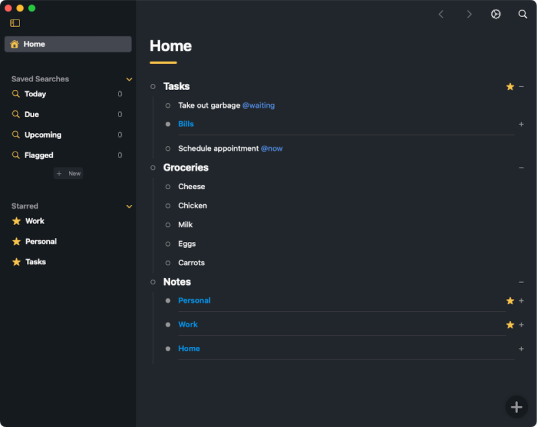
Mac App